Brick rendering is a common process used in both old and modern construction to provide a protective and decorative layer over brick walls. While rendering can enhance aesthetics and add durability, there are times when homeowners or renovators want to remove render from brick. The reasons can vary — from restoring the natural beauty of the brick to repairing damaged render or preparing the wall for a new finish.
The process is not as simple as peeling off paint; render bonds strongly to the brick surface, making it a time-consuming task that requires patience, proper tools, and a clear strategy. Moreover, removing render improperly can damage the brick surface, leading to costly repairs.
In this article, we’ll break down everything you need to know, including preparation steps, tools, removal techniques, safety tips, and maintenance after the render is removed. Whether you’re working on an exterior wall or an interior feature, this guide will help you get the best results while protecting the integrity of your bricks.
Tools and Equipment Needed
Basic Tools for Manual Removal
Before you start to remove render from brick, you need the right tools. Manual removal can be done with:
- Hammer and chisel
- Wire brush
- Scrapers
- Masonry knives
These tools work well for smaller areas or detailed work where precision is required.
Power Tools for Faster Results
For large-scale projects, using power tools like an angle grinder with a diamond-tipped blade or a rotary hammer can speed up the remove render from brick process significantly. These tools can cut through tough render more quickly, but they require skill to avoid damaging the brick beneath.
Safety Gear
Render removal creates dust and debris, so wearing safety equipment is non-negotiable. This includes:
- Safety goggles
- Dust mask or respirator
- Heavy-duty gloves
- Protective clothing
- Ear protection (if using power tools)
Preparatory Materials
Other helpful materials include drop sheets to protect surrounding areas, buckets for debris collection, and water spray bottles to reduce dust.
Preparing the Wall Before Removal
Inspect the Brickwork
Before you start to remove render from brick, inspect the wall for cracks, weak mortar joints, or damaged areas. If the wall is fragile, removing render could cause further deterioration, so repairs might be needed first.
Identify Render Type
Different render materials—such as cement, lime, or acrylic—require different removal approaches. Cement-based renders are harder to remove and may need more aggressive tools, while lime-based renders can often be removed with less force.
Clear the Surrounding Area
Ensure the area around the wall is clear of furniture, plants, or other obstacles. For exterior walls, cover nearby windows, doors, and pathways with plastic sheeting to prevent dust and debris from spreading.
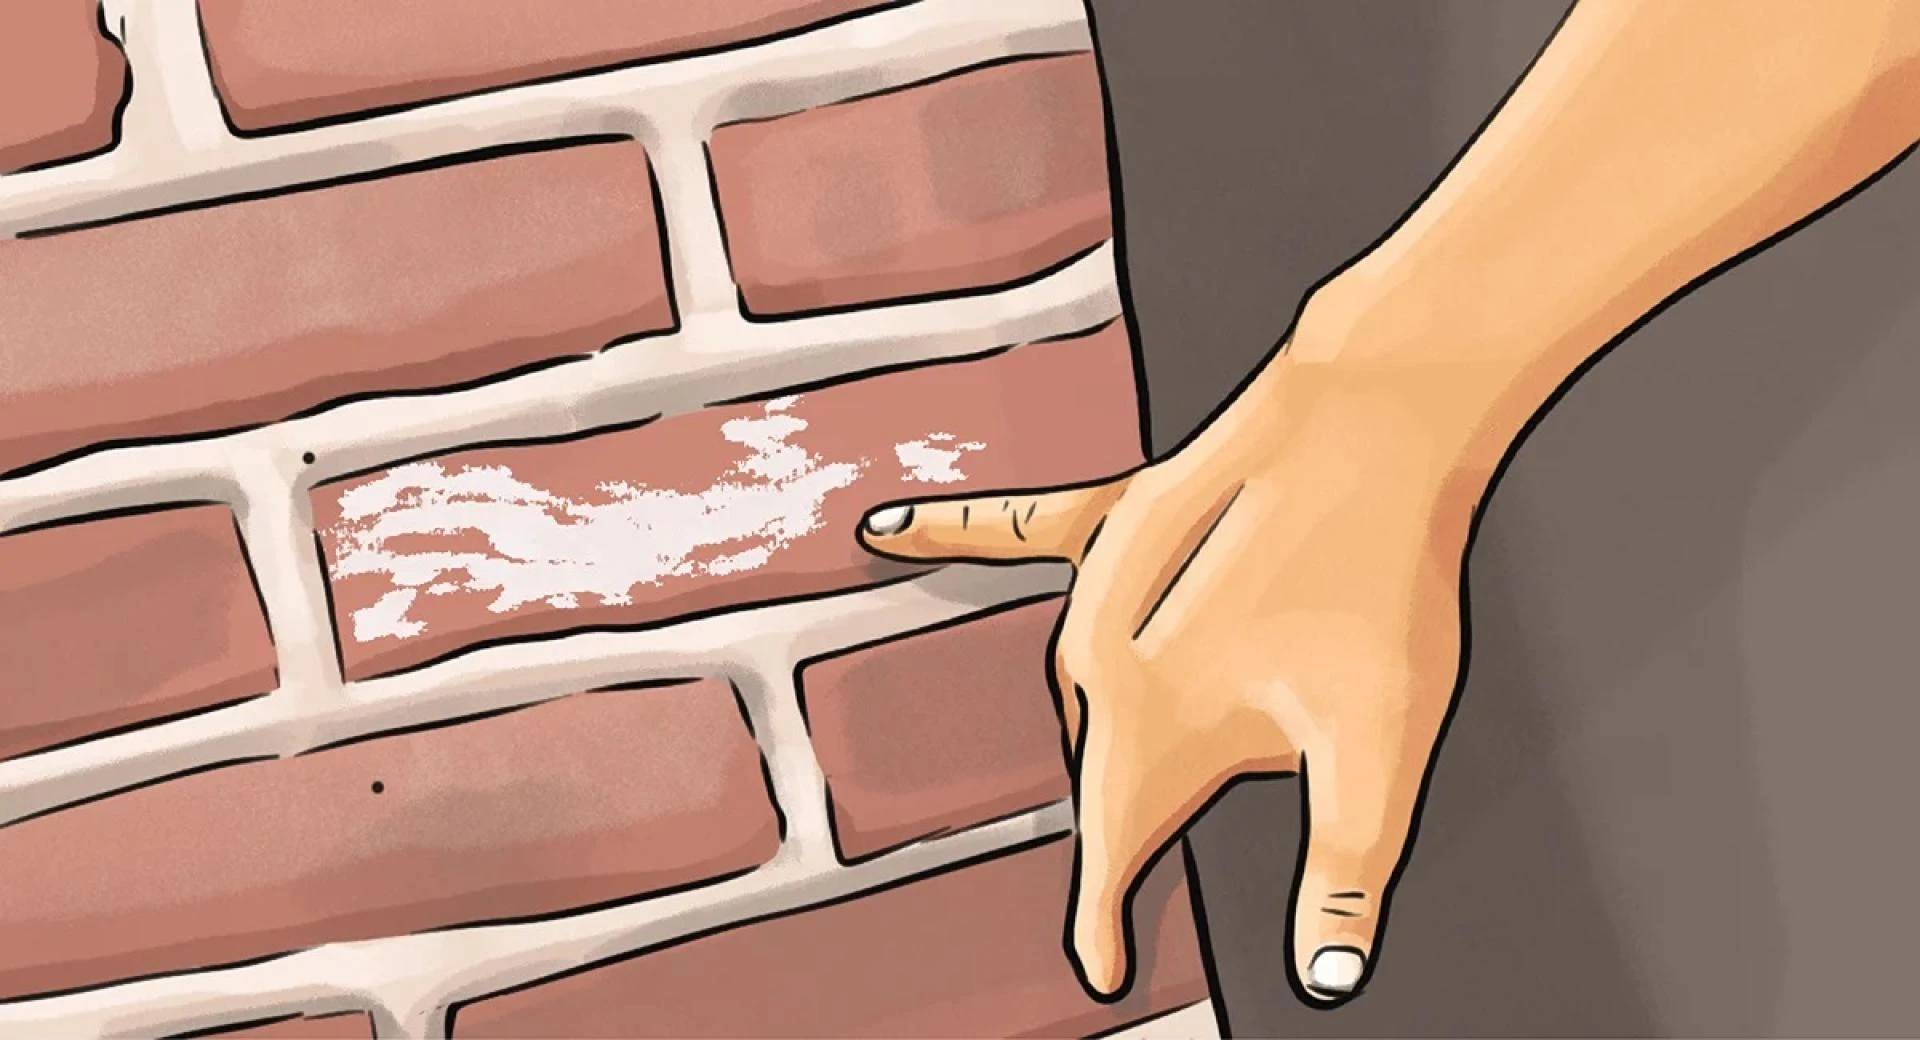
Moistening the Render
Lightly wetting the render with water can help soften it and reduce dust during removal. This is especially useful when working on older render that might be brittle.
Step-by-Step Techniques to Remove Render from Brick
Manual Chiseling Method
One of the most traditional techniques to remove render from brick is using a hammer and chisel. Start at the edges or corners and work your way inward. Hold the chisel at a slight angle to avoid digging into the brick, and apply consistent, moderate force.
Using an Angle Grinder
For harder renders, an angle grinder fitted with a masonry cutting disc can make horizontal and vertical cuts in the render. This breaks it into sections that can be more easily pried off. However, you must be extremely cautious not to cut too deep into the brick surface.
Rotary Hammer Drills
These tools are effective for thick render removal but can cause more vibration and potential brick damage if not used correctly. They are best for large, heavily coated walls.
Cleaning and Smoothing the Surface
After removing the main bulk of the render, use a wire brush or masonry scraper to remove any remaining small particles and smooth the surface. For stubborn patches, a light acid wash or brick-cleaning solution may be applied, but always test a small area first.
Safety Measures During Render Removal
Dust Control
Render removal generates a significant amount of dust, which can be harmful when inhaled. Use water spray bottles frequently to dampen the area, and ensure good ventilation when working indoors.
Proper Tool Handling
Power tools should always be used according to manufacturer guidelines. Maintain a firm grip and use both hands for stability. Never remove safety guards from grinders or drills.
Working at Heights
If you need to work on upper sections of a wall, use stable ladders or scaffolding with secure footing. Never overreach or lean excessively while working.
Waste Management
Collect debris in buckets or heavy-duty bags and dispose of it according to local waste management rules. Some areas have specific disposal regulations for construction materials.
Post-Removal Cleaning and Maintenance
Checking Brick Condition
Once the render is removed, carefully check the brick surface for chips, cracks, or mortar loss. Minor damage can be repaired using brick filler or mortar mix.
Brick Cleaning
To restore the original brick look, use a specialized brick-cleaning product or a mild soap-and-water mixture. Avoid high-pressure washing on older bricks, as it can erode the surface.
Sealing the Brick
If you plan to leave the bricks exposed, applying a breathable sealant can help protect them from moisture penetration while allowing natural vapor exchange.
Preventing Future Damage
Routine maintenance, such as inspecting mortar joints and cleaning dirt buildup, will help extend the life of exposed bricks and reduce the need for re-rendering.
Common Mistakes to Avoid
Using Too Much Force
Excessive force when chiseling can damage brick edges and mortar. Work slowly and patiently.
Skipping Protective Gear
Not wearing goggles, gloves, or a dust mask can result in injury or respiratory issues.
Neglecting Wall Inspection
Removing render from a structurally weak wall can lead to collapse or major repairs. Always check the wall’s condition first.
Incorrect Tool Use
Using inappropriate tools for the render type can make the job harder and risk damaging the bricks.
Conclusion: Restoring the Beauty of Brickwork
Learning how to remove render from brick is a valuable skill for any homeowner or restorer who wants to uncover the natural charm of their property’s masonry. While the process requires time, patience, and careful technique, the end result can dramatically enhance both the appearance and value of your home. By using the right tools, following safety precautions, and taking the time to inspect and maintain the wall afterward, you can ensure that your bricks remain strong and beautiful for years to come.
Whether you’re working on a small garden wall or the façade of a historic building, thoughtful render removal can bring out the timeless appeal of exposed brickwork.
FAQs
1. Can I remove render from brick myself?
Yes, you can, but it requires the right tools, safety gear, and patience. For small areas, manual methods work well.
2. How long does it take to remove render from a brick wall?
The time depends on the wall size, render type, and tools used. A small wall may take several hours, while a large, thickly rendered surface can take multiple days, especially if you work manually.
3. Will removing render damage my bricks?
It can if not done carefully. Using excessive force or the wrong tools can chip bricks or damage mortar.
4. What is the easiest way to remove render from brick?
For softer render, manual chiseling works best. For harder cement-based render, an angle grinder with a masonry blade is effective, but requires precision to avoid cutting into the brick underneath.
5. Do I need to seal bricks after removing render?
Yes, sealing helps protect exposed bricks from moisture damage while still allowing them to breathe.