Most people start a pergola project with a screenshot and a rough budget, then realise the hard part isn’t picking a style, it’s making the space work on a real block with real weather.
If you’re trying to browse pergola options for sale, it’s worth pausing for ten minutes first to get clear on what the structure actually needs to do: shade at the right time of day, rain cover that doesn’t dump water at the back door, and a layout that doesn’t turn every BBQ into a game of “mind the post.”
A good pergola feels invisible in the best way: it’s just there when you need it, and it doesn’t create new problems you have to live around.
Even if the supplier link in this article disappeared, the framework below would still help you brief a builder, compare quotes properly, and avoid the classic mistakes that turn “outdoor living” into “why did we do this?”
Start with the job the pergola must do
Begin with plain language, not product language: “We need shade from 3–6pm,” or “We want to eat outside without sprinting indoors when it rains,” or “We want a transition space that makes the yard feel connected to the kitchen.”
A pergola built mainly for shade can stay lighter and more open, while a pergola built for rain cover needs a different roof strategy, drainage plan, and even furniture layout.
Write down the top three things the space must support, weeknight dinners, weekend entertaining, kids’ play, a quiet coffee corner, poolside lounging, a covered walkway, and rank them.
Then list the deal-breakers: blocked views, a dark living room, constant leaf build-up, or a structure that makes a small yard feel cramped.
Pick the structure type: attached vs freestanding
This choice shapes almost everything that comes next.
Attached pergolas often feel like a true extension of the house because the connection point helps the indoor-outdoor line disappear.
They also demand more thought around rooflines, water run-off, and how weather is managed near doors, windows, and slab edges.
Freestanding pergolas are more flexible to position, handy when the best spot is away from the house, aligned with a view, or near a pool.
They usually need more posts and can feel more like an “outdoor room,” which is a win if privacy or zoning the backyard matters.
Do a quick reality check with pegs or chalk: mark likely post locations, place a couple of chairs roughly where they’d go, and walk through the space.
If the posts feel like they’ll be in your way every day, it’s a sign to rethink size, spans, or shifting the footprint by 300–600mm.
Materials that match Australian conditions
Material is partly about look, but mostly about how you want to live with the pergola over time, through sun, dust, storms, and the occasional “we’ll clean it next weekend.”
Timber brings warmth and suits a lot of Australian homes, but it typically asks more from you (finishes, movement, ongoing upkeep).
If you love the timber aesthetic, be honest about whether you’ll actually maintain it, or whether you’ll start to resent the maintenance two summers from now.
Aluminium is popular because it’s clean-lined and tends to be lower maintenance when specified and installed properly.
It won’t feel like timber, so the question becomes whether you value warmth and character or crisp lines and less fuss.
Steel can suit certain spans and looks, but coating quality and corrosion management matter, especially near the coast.
Whatever you choose, ask one practical question: “How will this look and feel after five years of weather?”
Roofing and cover options that change how the space feels
Roofing is where pergolas either become genuinely useful, or become a compromise you notice every time you step outside.
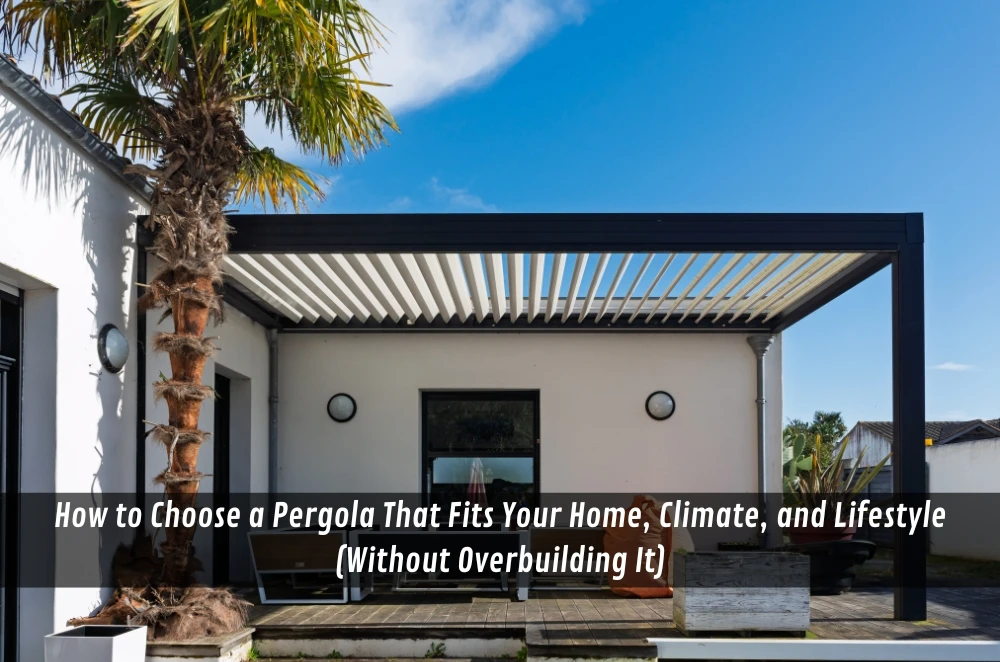
Open slats / louvres (fixed or adjustable) can balance light and shade nicely, but they’re not automatically rain-proof unless the system is designed to be watertight.
They’re a strong choice when airflow and an outdoor feel matter as much as shelter.
Solid roofing shifts the space toward “all-weather cover.”
That’s great for outdoor dining and protecting furniture, but you’ll need to think about heat, glare, and how much light you’re taking away from adjacent indoor rooms.
Sometimes the best answer is mixed coverage: solid where the table sits, and more open where you want light and breeze.
Also think about water early: where it will run, where it will drain, and what happens in a downpour when gutters overflow or leaf litter builds up.
Common mistakes that cost time and money
Most pergola regrets don’t come from “wrong colour”, they come from planning details that weren’t locked in early.
A common mistake is measuring the empty area, not the use area (chair pull-back, walking paths, door swings, BBQ clearance).
Another is ignoring drainage and fall, especially when tying into existing paving where water already pools.
People also underestimate how easily a pergola can darken interior rooms when it sits outside a main living window or sliding door.
A big one is committing to a design before confirming what approvals or rules might apply locally, then having to redesign after the fact.
And the quiet killer: the brief was “we want a pergola,” not “we want shade from late afternoon while keeping morning light and a clear walkway.”
Decision factors when choosing an approach or provider
There are different ways to get a pergola built, design-and-construct, custom builder, kit-based systems, or working with a specialist, so choose based on complexity and how much risk you want to carry.
If the site is simple and you’re confident with measurements, a straightforward solution might suit.
If the site is fiddly (slopes, tight access, unusual rooflines, coastal exposure, or you’re chasing a specific look), it’s often worth prioritising design support and clear documentation.
Use these decision factors to compare options:
- Scope clarity: Are inclusions and exclusions written plainly (posts, footings, drainage, finishes, removal of existing structures)?
- Site questions: Do they ask for levels, access constraints, drainage points, sun direction, and nearby services?
- Design fit: Do they talk about how it will feel from inside the house, not just how it looks from the yard?
- Approvals awareness: Do they flag that requirements vary and explain what you may need to check locally?
- Maintenance reality: Do they discuss upkeep and cleaning, not just day-one appearance?
- Installation plan: Do they explain how existing paving, landscaping, and drainage will be protected during work?
If it helps to see how different designs are typically packaged and described, the Unique Pergolas options overview can be a useful reference point while refining a short list.
Simple first-actions plan for the next 7–14 days
Day 1–2: Walk the yard at three times (morning, mid-afternoon, early evening) and note sun direction, glare, and hot spots.
Day 3–4: Measure the “use area” with furniture in mind, then mark possible post positions and walk around them.
Day 5–6: Decide your non-negotiables: shade vs rain cover priority, attached vs freestanding preference, and your realistic maintenance tolerance.
Day 7–10: Save 8–12 reference images, but label why you like each one (light, privacy, roof look, colour, how it connects to the home).
Day 11–14: Prepare a one-page brief: the job-to-be-done, rough dimensions, site notes (slope, drainage, access), and your top three constraints.
Local SMB Mini-Walkthrough (Australia)
Start by noting if the area is exposed to strong winds or salty air, because it can influence design and materials.
Take photos from inside the main living room looking out, not just from the lawn looking back.
Call two local installers and ask what they need for an accurate quote, then use that list to tighten your brief.
If strata or a shared boundary is involved, note setbacks and neighbour considerations early.
Ask what lead times look like around school holidays and the warmer months.
Keep one simple rule: if the plan relies on “we’ll work it out on the day,” it isn’t ready.
Operator Experience Moment
In practice, the easiest way to de-stress a pergola build is to stop chasing the “perfect look” and start validating the boring bits, post locations, drainage, and how people actually move through the space. Many headaches begin when a pergola is sized to the slab rather than the furniture and walking paths. Once those fundamentals are solved, the style decisions stop feeling like guesses.
Practical Opinions
Function first, because style is easier to tweak than shade, drainage, and access.
If maintenance is a sore point, pick the option you’ll still like when it’s dusty and due for a clean.
When in doubt, design for the average week, not the two big parties a year.
Key Takeaways
- Define the pergola’s main job (shade, rain cover, privacy, or a mix) before choosing materials or roof style.
- Attached vs freestanding choices affect drainage, layout, and how “room-like” the space feels.
- Roofing decisions change light, heat, glare, and how usable the area is in bad weather.
- The most expensive mistakes usually come from poor measurement, ignored drainage, and unclear briefs.
Common questions we hear from Australian businesses
Do I always need council approval for a pergola?
It depends… requirements vary by council, site conditions, and how the structure is designed. A practical next step is to write down your proposed size, location, and roof type, then check local rules before locking in a final design. In many Australian suburbs, boundary setbacks and visibility from the street can change what’s required.
What’s better: a pergola mainly for shade, or one that’s fully weatherproof?
Usually… it comes down to how often you’ll use the area in rain and whether you can tolerate reduced natural light indoors. A practical next step is to rank your top three use cases and choose roof coverage that supports them without making the adjacent room feel gloomy. In many parts of Australia, summer sun can be brutal, but storm rain can arrive sideways, so “some cover” doesn’t always mean “dry cover.”
How do I choose between timber and aluminium?
In most cases… the right choice is the one that matches your maintenance appetite and the look you want long-term. A practical next step is to decide what “acceptable upkeep” looks like for you (regular refinishing vs occasional cleaning) and choose accordingly. In Australian conditions, especially coastal areas, finish quality and corrosion considerations can matter as much as the base material.
What should I prepare before requesting quotes?
Usually… a clear brief saves time and reduces surprise costs. A practical next step is to share rough dimensions, photos of the area, notes on slope/drainage/access, and whether you prefer attached or freestanding. In many Australian homes, access constraints (side passages, retaining walls, existing paving) can meaningfully affect installation planning.