Tile failures don't always begin with a bad installation. They start beneath the surface, where most people don't think to look.
A cracked grout line. A hollow sound underfoot. Tiles that shift or sit unevenly. These problems rarely happen because of poor workmanship on the surface. They occur because the subfloor wasn't prepared correctly before the first tile was ever laid.
Subfloor preparation sets the stage for everything that comes after. It determines how well the tile adheres, how level it sits, and how long it lasts. Skip this step or rush through it, and even the most beautiful tile work won't hold up over time. The cracks, movement, and moisture damage that follow aren't just cosmetic issues. They lead to expensive repairs and disrupted daily life.
Proper preparation isn't optional. It's the foundation that makes everything else work.
What Is a Subfloor and Why Does It Matter?
A subfloor is the structural layer that sits beneath your finished flooring. It provides the stable base that supports tile, grout, and foot traffic. Common subfloor materials include plywood and concrete, each with different strengths and installation requirements.
Tile depends on structural stability more than most other flooring types. Unlike carpet or vinyl, which can flex slightly, tile is rigid. It can't bend or adjust to movement beneath it. When the subfloor shifts, dips, or flexes, the tile has nowhere to go. That tension creates cracks in the grout and sometimes in the tile itself.
A solid, level subfloor distributes weight evenly and prevents the stress that leads to damage. Without it, even premium tiles won't perform the way they should.
Common Problems Caused by Poor Subfloor Preparation
When subfloor prep is rushed or skipped entirely, the problems show up quickly:
Cracked grout lines appear when the subfloor flexes or settles unevenly. Grout is meant to fill joints, not absorb movement. Once it cracks, moisture can seep beneath the tile and cause further damage.
Loose or hollow-sounding tiles signal poor adhesion. If the subfloor wasn't cleaned, leveled, or primed properly, the thinset mortar won't bond correctly. Tiles may start to lift or shift over time.
Uneven tile surfaces happen when dips, bumps, or slopes in the subfloor aren't corrected before installation. The result is a floor that looks wavy or feels uneven underfoot, especially noticeable with large-format tiles.
Moisture-related damage can develop when moisture barriers or waterproofing steps are ignored. Water infiltration weakens adhesives, promotes mold growth, and shortens the lifespan of the entire installation.
Each of these issues traces back to preparation, not the tile itself.
Leveling and Surface Preparation: The Foundation of Success
Before any tile goes down, the subfloor must be evaluated and corrected. This process involves several key steps:
Checking for dips, slopes, and uneven spots ensures the surface is flat enough to support tile. Even small variations can create lippage, where one tile edge sits higher than another. Installers use leveling compounds to fill low areas and grind down high spots.
Moisture testing and mitigation protects against hidden problems. Concrete subfloors can retain moisture long after they're poured. Testing measures vapor emission rates and helps determine whether a moisture barrier is needed before tile installation begins.
Reinforcing weak areas prevents future movement. This might include adding extra screws to plywood, replacing damaged sections, or installing an underlayment that adds rigidity and isolates the tile from minor subfloor movement.
These steps take time, but they eliminate the root causes of tile failure before they become visible problems.
The Role of Layout Planning Before Installation
Layout planning begins long before the first tile is placed. Thoughtful planning ensures balance, symmetry, and proper spacing throughout the installation.
Movement joints and expansion gaps allow tile to shift slightly with temperature changes without cracking. These joints are especially important in large rooms or areas exposed to heat and humidity.
Full Tile Layout Design Wilmington DE services help homeowners visualize how tile will look in their space. This step identifies potential issues with tile cuts, pattern alignment, and transitions between rooms. Adjusting the layout on paper is far easier than making changes once tile is already installed.
Starting with a clear plan reduces waste, improves visual flow, and ensures the finished result looks intentional rather than improvised.
Special Considerations for Large Format Tiles
Large-format tiles are popular for their clean, modern look and fewer grout lines. But they demand more from the subfloor than standard tiles.
Bigger tiles amplify imperfections. A small dip in the subfloor that might go unnoticed with smaller tiles becomes obvious when a large tile spans it. The tile can rock or develop hollow spots where it doesn't bond fully to the subfloor.
Lippage becomes a bigger risk without proper leveling. When edges sit at different heights, the floor looks uneven and feels uncomfortable to walk on. Lippage also creates tripping hazards and makes cleaning more difficult.
Large Format Tile Installation Wilmington DE requires precision at every stage. The subfloor must be flatter, the thinset application more consistent, and the leveling more exact. Cutting corners on preparation makes problems inevitable.
Subfloor Preparation for Different Tile Applications
Different tile installations have unique preparation requirements.
Tile Floor Installation
Floors bear constant weight and foot traffic. The subfloor must handle load-bearing demands without flexing or sagging. Proper underlayment installation adds strength and isolates the tile layer from minor subfloor movement.
Tile Floor Installation Wilmington DE projects benefit from thorough preparation because floors endure more stress than walls or backsplashes. A well-prepared subfloor ensures the tile performs reliably for years, even in high-traffic areas.
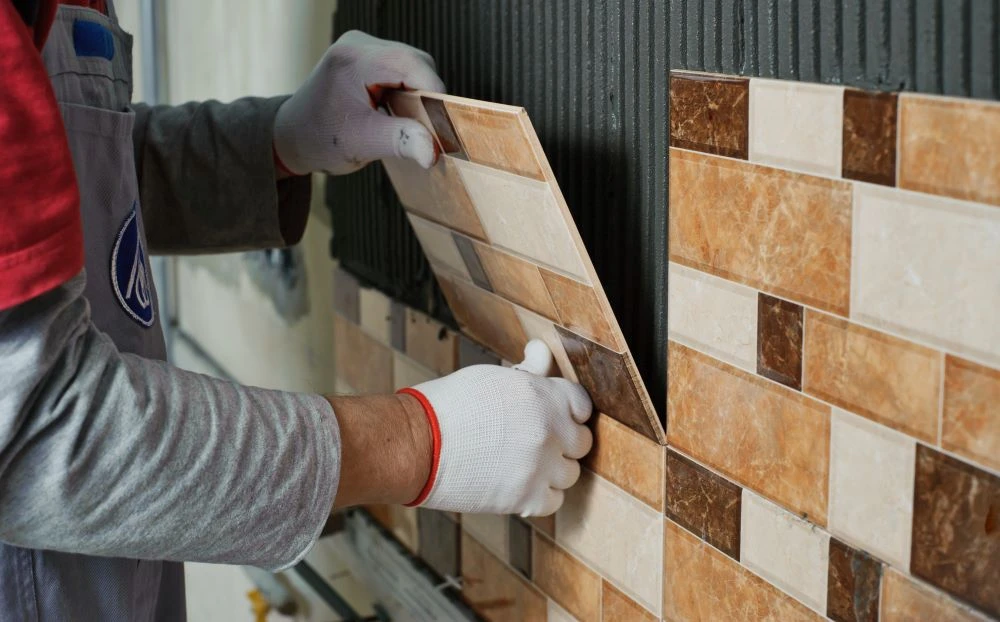
Tile Backsplash Installation
Backsplashes require smooth, clean wall surfaces for proper adhesion. Drywall must be primed, and any texture or paint that could interfere with bonding needs to be addressed.
Moisture concerns are especially relevant in kitchens and bathrooms, where water exposure is constant. Waterproofing behind the tile prevents damage to the wall structure and ensures long-term durability.
Tile Backsplash Installation Wilmington DE involves careful surface prep to ensure tiles stay firmly in place and continue looking sharp despite daily exposure to water, grease, and heat.
Professional Preparation vs DIY Shortcuts
Subfloor preparation requires specific tools and expertise. Professionals use laser levels, moisture meters, grinding equipment, and self-leveling compounds to prepare surfaces correctly.
DIY shortcuts often skip these steps to save time or money. Eyeballing flatness instead of measuring it. Skipping moisture tests. Using the wrong type of underlayment or adhesive. These mistakes add up quickly and lead to failures that cost more to fix than professional preparation would have cost initially.
The long-term cost comparison favors professional work. A properly prepared subfloor supports tile that lasts decades. Rushed prep leads to repairs, replacements, and the hassle of living through multiple rounds of work.
Investing in preparation upfront saves money and frustration later.
Signs Your Subfloor May Need Attention Before Tile Installation
Certain warning signs suggest the subfloor isn't ready for tile:
Squeaking floors indicate loose boards or gaps in the subfloor structure. These areas need to be secured before tile can be installed safely.
Visible dips or movement show that the subfloor isn't stable. Walking across the floor shouldn't cause noticeable flexing or bouncing.
Previous water damage compromises the subfloor's integrity. Stains, warping, or soft spots mean moisture has weakened the material. Damaged sections must be replaced before tile installation begins.
Uneven transitions between rooms suggest the subfloor height varies. Transitions need to be leveled or built up so tile flows smoothly from one space to another.
Addressing these issues before installation prevents problems that would otherwise become evident only after the tile is down.
Built Right from the Ground Up with Premier Home Solutions
Tile installation done correctly begins with what you can't see. Subfloor preparation determines whether tile will last for years or fail within months. It's the difference between a floor that feels solid and one that shifts underfoot. Between grout lines that stay intact and ones that crack repeatedly.
Premier Home Solutions approaches every tile project with the understanding that durability starts beneath the surface. Preparation isn't rushed. Surfaces are leveled, moisture is tested, and weak areas are reinforced before the first tile is ever set. This method takes longer upfront, but it ensures the finished result performs reliably over time.
Homeowners planning tile installations deserve work that holds up. That means starting with a subfloor that's ready to support the tile, not just hoping it will be good enough.
If you're considering a tile project and want it done right from the foundation up, reach out to Premier Home Solutions. Call (302) 464-5665 or email [email protected] to discuss your project and see how proper preparation makes all the difference.